Showing posts with label Diy. Show all posts

Wednesday, February 5, 2014

DIY // Natical Name Necklace

I am excited to share this REALLY easy diy project. (that I photographed last spring.) I originally got the idea for this necklace after I created this Antro inspired diy necklace almost 2 years ago. I love the aesthetic of wooden jewlery because it is often incorporated in unconventional ways. A little background for those of you who may have grown up outside of a maritime community and aren't aware that there is a special maritime alphabet. The alphabet is made of flags and is used to facilitate communication between vessiles or to request help. Your can read more about the alphabet here. I used this alphabet to spell my name out! This is a really preppy and stylish way to incorporate personized jewlery into my wardrobe. This project could be elaborated on in many way by adding or removing flags. I think it would be exciting to spell out acronyms like PTL or even initials of someone special. The neat part of this project is that these wooden flags are made from craft POPSICLE STICKS! Cool, huh?


Supplies needed: Popsicle sticks, hand drill, chalk or pencil to trace out pattern, xacto knife, sandpaper to prevent slivers, paint and jewlery chain. 

I am trying out a new stream lined version on my tutorials because I often don't post projects because the task of typing out an elaborate step by step is overwhelming somedays. So let me know if you have any questions. Please let me know if you end up creating your own natical alphabet name necklace!

Monday, June 3, 2013

DIY // Easy Ukulele Make Over

A couple years ago I was beyond obsessed with learning how to play a ukulele so my wonderful boyfriend surprised me with one for my 21st birthday. I adore it. I found out soon after receiving this musical instrument that I have absolutely no rhythm like strumming is the hardest thing ever. Don't even get me started on playing songs because when I am playing a simple song it doesn't sound like anything to me. All those musical set backs aside I really enjoy practicing chords and making up silly songs. Anyway, the uke Sergio gifted me had an airbrushed palm tree which although festive didn't suit my style very well. I got the green light that Sergio wouldn't be hurt if I altered my uke in anyway so I came up with a super easy way to make my pretty little lady even prettier more info after the jump.

Friday, March 29, 2013

DIY // Ticket Stub Art

Here is a confession: I hoard paper. It is honestly an issue. I mean it. There are all these little scraps of paper I have be hanging onto for some reason since before middle school. A lot of these little pieces of  paper tend to be tickets for every. single. concert. or. museum. or. play. I. have. EVER. been. to. The superfluous punctuation in the last sentence was meant to add drama. I hope you whipped out your internal Morgan Freeman voice to read it. I decided to gather up all my ticket stubs and make something visually appealing. This is a really easy, simple take on all of the neat concert ticket displays I've seen floating all over Pinterest. The project could also be used as a white board but I am not really into that trend but go banana's if that is your thang. Instructions after the jump.

Monday, February 25, 2013

DIY // Fabric Cat Brooch


This week I bought my first piece of clothing that feature an over all cat print (actually my first article of clothing that has any cats on it) which means that my status as a cat lady has officially been set in stone. I thought I would commemorate my further advancement into being a 'cat person' with a cat DIY. The how-to can be found after the jump. I thought I would note here that the wooden base of this project can be purchased at Michael's for 23 cents and I highly suggest you pick one up and make your own version of this super quick project that honestly took me all of 25 minutes to make.

Thursday, January 24, 2013

DIY // Geode Ring


I have had this geode since I was eight years old from a family vacation to the Dakota's. Ever since I that trip I have been nothing short of obsessed with rocks. I believe that trip sparked my interest because every souvenir shop I went into was over flowing with geologic gems. literally. I am not  kidding when I say I am obsessed with rocks. I have countless plastic containers filled with rocks I have found in various states and countries. I know and could share the story behind each and every  rock with anyone who would listen. I love rocks so much that at the age of 21 I asked for and received a rock tumbler for Christmas. Silliness aside I've had this rock propped up on the window sill of three different houses over the years acting as a sun catcher and I figured it was time for this pretty pink rock to get a new job.  I've intended to make into something even more beautiful for awhile and the other day I decided to finally do just that. Instructions after the jump.


Sunday, January 13, 2013

DIY // Metallic Hair Branches


It's been awhile since I've taken the time to plan and photograph a DIY and today that crafty drought has ended! A couple years ago Urban Outfitters sold a set of bobby pins that looked like branches. Since then I had been wanting to make a few hair accessories that were made from actual branches. While I waited for a load of laundry to dry I managed to finally make said hair branch accessories. I love that I saw something that captivated me in a store two years ago then let the idea fester in my mind until voila! I created something just as elegant, dainty and beautiful as the original item but with a personalized narrative. (Excuse me while I wax poetically about D.I.Y. Projects)

Monday, October 8, 2012

DIY // Floral Sunnies Version Two


I posted another Sunglasses DIY  in August which is very similar to this one. Except this time I have added floral material to the face of the glasses. The previous version of this project features floral material added to the temples... little variation, big difference. The earlier DIY can be seen here. I have not posted my usual extremely detailed tutorial because as I feel as though I already wrote basically the same post earlier in the year.... I feel that way mostly  because that is true. After the jump you will find a couple tips on how to successfully replicate this DIY...and might also find a few low quality how-to photos featuring helpful hints but don't expect TOO much from me!

p.s. I wear these glasses all the time because I appreciate the handmade feel of this pair  as compared to the original glasses I posted which again can be seen here.

Thursday, August 2, 2012

DIY // Cute Running Shorts


I am just as guilty as anyone else of wearing my workout clothes out in public... I mean sometimes I just don't have anytime to change out of my running gear before heading out to the grocery store or bank. Before I started running it was actually one of my pet peeves to see people grocery shopping in gym clothes now it only bothers me when I see men shopping in their bike shorts. Anyways, I am not really a 'sporty' person (SHOCKING) and some of my athletic apparel felt a little too 'gym class' and not enough like my style. So I revamped these shorts! More details after the jump. 

Saturday, July 28, 2012

DIY // Floral Sunnies Make Over


I got a free pair of cheap, plastic, bank freebie sunglasses last summer which have a great shape but there was never an appropriate moment for me to wear a pair of black plastic and neon yellow on my face... I transformed my freebies sunnies into a lovely pair of feminine mint/floral lenses. I am really pleased with the end product plus I had every thing on hand so it cost me nothing to make! I love free stuff! Let me know if this project inspires you to make your own pair! Instructions and superfluous instructions can be found after the jump. You might notice that some of the steps feature a different pair of glass that is because I had to re-photograph the project after when I realized it had been on landscape mode...ugh. 


p.s. next week I will bring you a second Sunglasses DIY!

Tuesday, July 3, 2012

DIY // Pendleton Inspired Shorts


I've been seeing DIY shorts ALL over Pinterest lately and since I have yet to learn how to even turn on my mothers sewing machine, let alone attach some thrifted fabric to the pockets of cut off shorts I decided to create my own version of hipster shorts (you know that totally what they are) I was inspired by the Pendleton brand when I planned out my pattern.... ya know just in case you happen to be wondering. Details after the jump.


Thursday, May 10, 2012

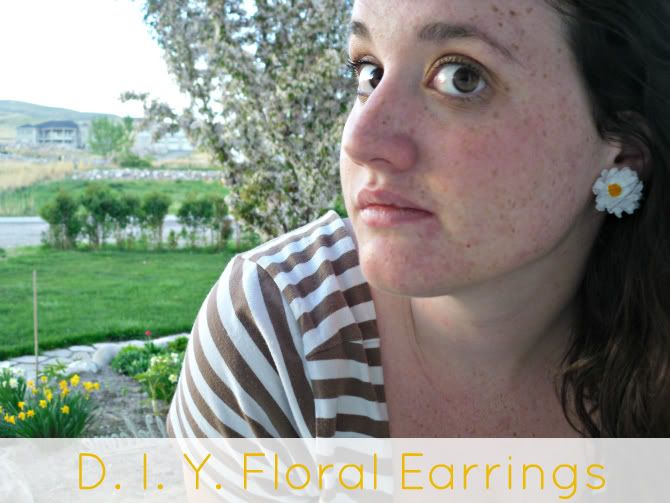
Floral Earrings // DIY

Schools out for summer and this busy body has been applying for jobs, plastering babysitting fliers all over town, reading up a storm AND doing a few DIY projects... although I am sure I should do more job hunting and less blogging. Anyway, it's that lovely spring/summer time of year when the blogosphere becomes flooded with Floral Crowns (don't worry I have one coming soon too) so I gave into the seasonal blogger cliches and jumped on the fake flower bandwagon (it was a very hard bandwagon to straddle too because I've always been against fake flowers my whole life... I NORMALLY think silk flowers are tacky only because flowers should not last long enough to to get dusty) I made a pair of daisy earrings that are the perfect amount of tacky to become my new favorite pair of posts.

Tuesday, April 17, 2012

Plastic lenses for Vintage Frames // DIY

I bought a pair of super cute vintage glasses at a rummage sale last summer for dirt cheap with the full intention of getting non-prescription lenses put in as soon as I got a job. Well, the job and the new lenses never happened. I am sure there is a much more permanent and higher quality way to go about this project but I worked with the resources I had available to me. The plastic I used is a tad foggy but that can't be any worse for you peepers than stranning to look through someone else's prescription lenses. This project was made with the full intention of being a photo prop, so if you ruin your perfect eyes don't try and blame it all on me.

Friday, April 6, 2012

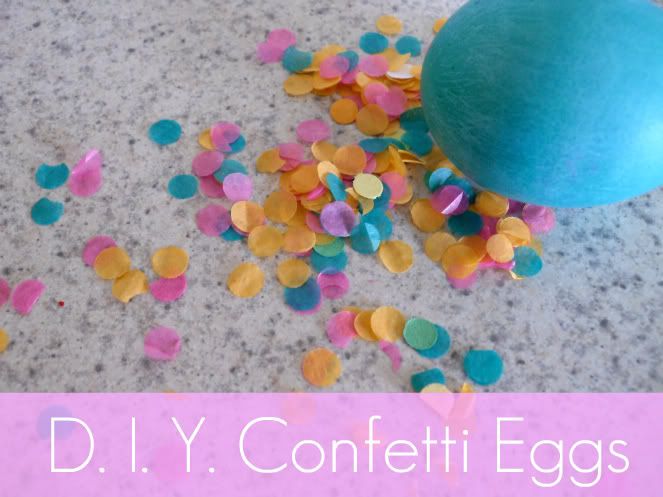
DIY // Confetti Eggs

When I first started dating Sergio I was introduced to new traditions and the one that was most surprising for both of us was how our families dealt with Easter eggs. Every year my entire family sits down and decorates hard boil eggs as apposed to Sergio's family who sits down every year to dye hollow eggs and stuff each full of confetti specifically intended to crack over family members heads on Easter Sunday. It was a hard tradition to wrap my brain around until I joined in on the festivities which where a blast. I've been trying to learn more about the Mexican traditions that come along with my cute boyfriend so I figured I would share my first attempt at confetti eggs. I asked Sergio for help but he explained that his mom gets everything ready for them each year and he had never paid attention to her so I was kinda on my own. Tutorial after the jump.

Friday, March 23, 2012

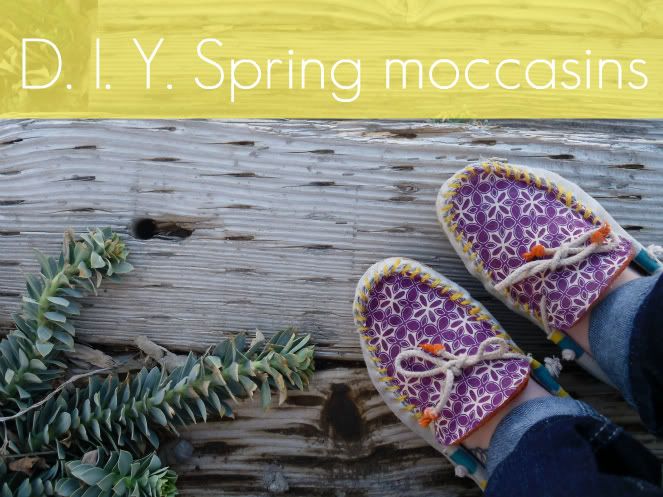
Spring Moccasins // DIY


My Nana used to buy all of the grandchildren a pair of moccasins every Christmas from some old lady equivalent of the Sky Mall magazine, I've always worn each pair with pride daily until they are almost falling off my feet. This pair got all messy chasing after my cousins dog in the mud, I had to find away to cover up the damage done when I washed them by hand...the woes of leather shoes. So I waved my crafty hands around and whipped up this little revamp. Full tutorial can be found after the jump.

Saturday, January 28, 2012

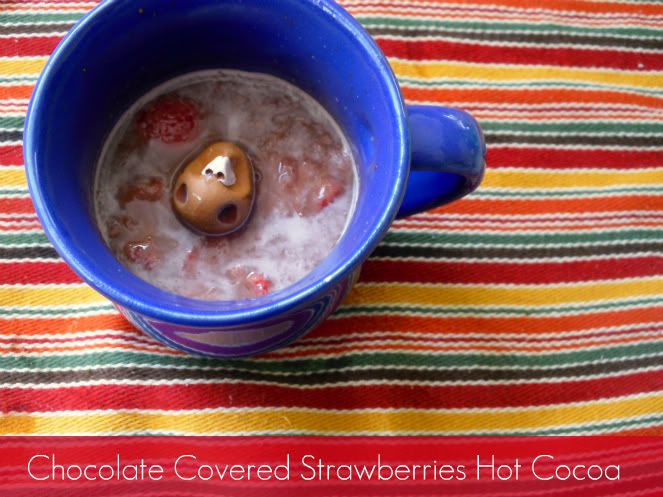
Chocolate Covered Strawberries Inspired Cocoa

I've been brainstorming and experimenting with different ways to incorporate more fruit daily into my diet because, well, for the most part I don't like fruit. I was the kid who needed to be convinced to try berries and would rather down a bowl of carrots or broccoli any day. So I came up with a way to sneak some strawberries in my early morning pre-lecture cocoa last last weekend while I was reducing some black berries to put on pancakes. This Strawberry infused cocoa recipe is super easy and super yumtastic (Step after the jump)

Tuesday, January 10, 2012

Crazy Cat Lady Nails // DIY

Happy first DIY project of 2012 everyone! I decided to kick this year off right... with cats on my nails! This project is easy peasy but fabulous - if I do say so myself! I guesss you could modify the idea for any animal but I can't think of another creature I would wear more proudly than a feline! So I suggest not trying to fix something that isn't broken and just embracing your inner (or very flamboyant ) cat lady.

Monday, October 31, 2011

Halloween Sparkle Ring // DIY

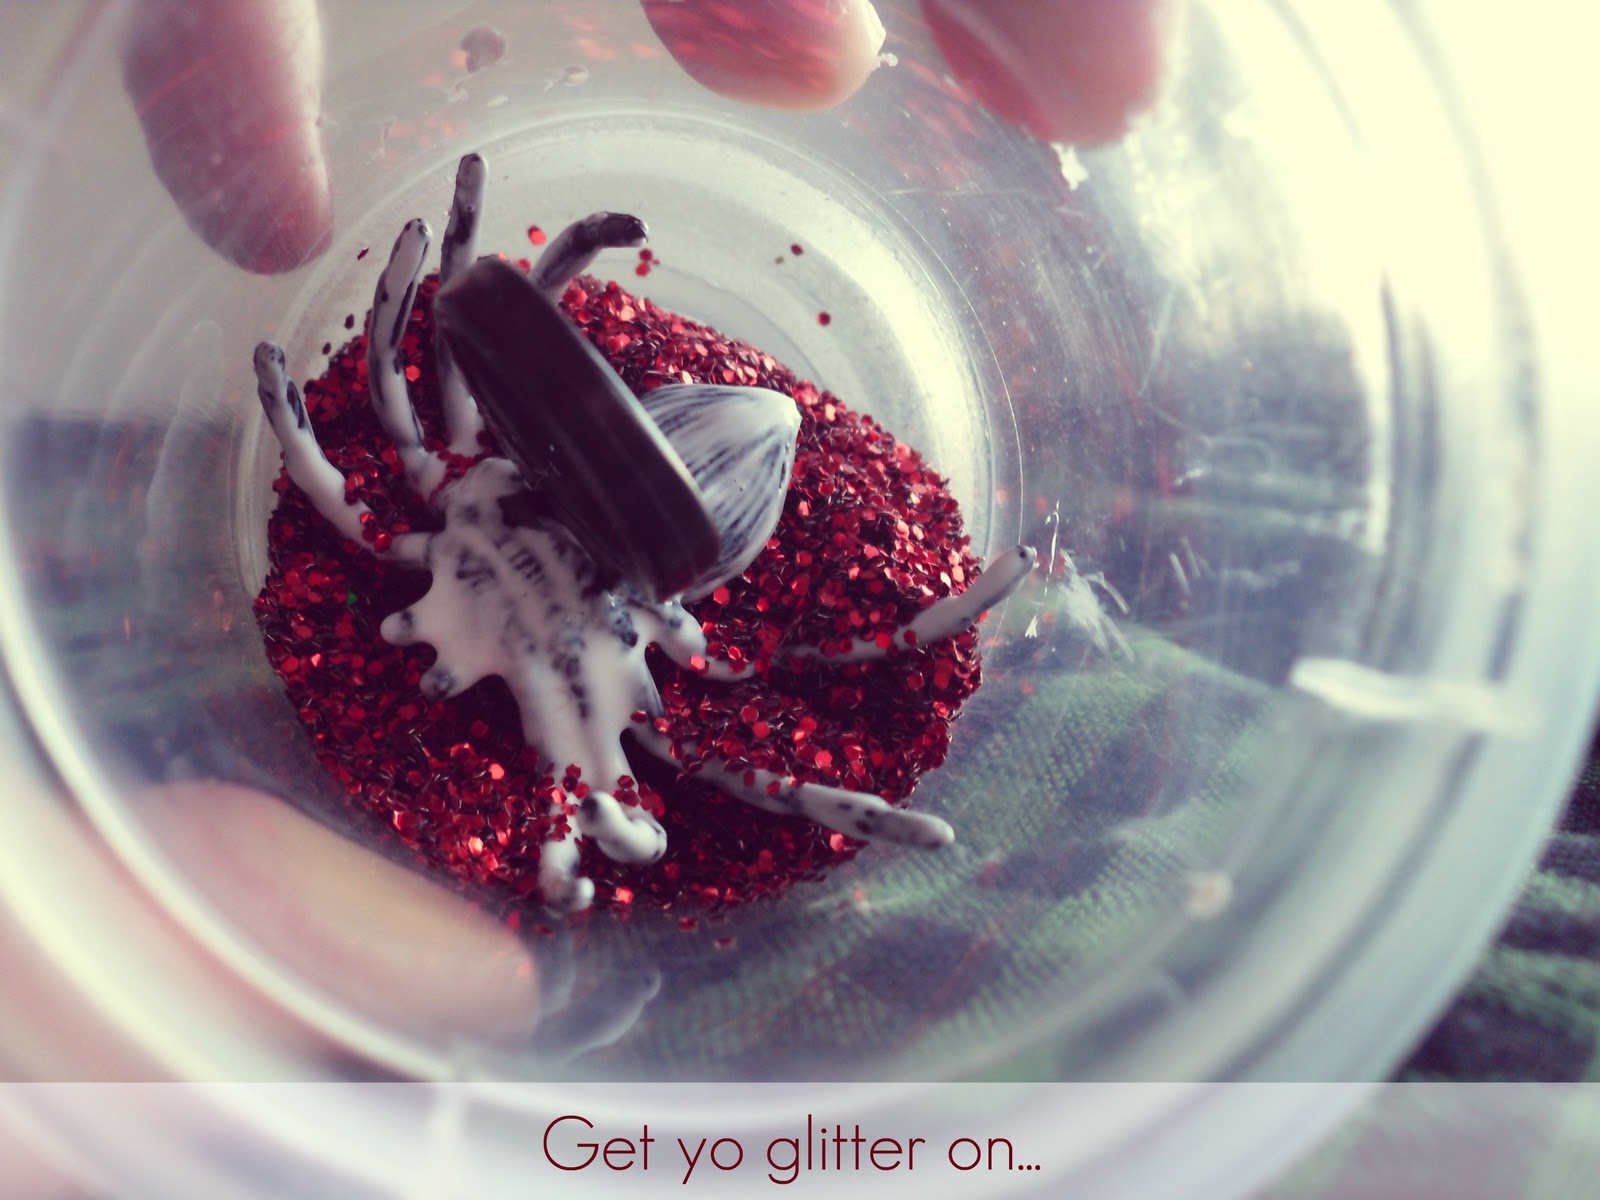
First off Happy Halloween! I am not one for scary movies, haunted houses or day dreaming of goblins/ghouls so I don't ever really get into the spirit for today. Although I am a sucker for cheesy Halloween traditions like watching Halloweentown or Hocus Pocus, carving pumpkins, eating lots of candy on a school night, black cats, spiders, bats, costumes, fake spider webs and trick or treating. So I put together a quick and festive DIY in honor of one of the finer things Halloween has to offer... Plastic spider, skull and bat rings! Do you remember getting 10 or 12 plastic rings that never fit your chubby little fingers every Halloween and squeezing one on each finger and wearing them everyday to school for like a week until you started to lose 'em? No, well needless to say I do.
This is a super easy project all you need is what ever brand of craft glue you prefer, glitter, dollar store plastic Halloween rings, a paint brush, a shallow dish and a small container for glitter. I bet you have all of that stuff scattered around your craft room right now? Well, you should because I have those items AND I live in a dorm.
Self explanatory, really. I used the cover to a small salad dressing/condiment container for sack lunches. You totally [don't] know what I mean right? Pretend, use your imagination it is Halloween after all...
Again self explanatory...I would suggest only putting glue on the plastic body and not around the ring it self because the glitter would rub off quickly and get all over you. I also would suggest using a paint brush to get the underside of the ring and those pesky spider legs covered in glue.
To apply the glitter to the ring without making a huge mess I poured the glitter into a small plastic container THEN set the ring which was thinly covered in wet glue INTO the container and did a little 'shake and bake' (aka covered  the top up with my hand and shook the glitter all around)  to get the ring evenly covered in craft glitter.
Obviously. Duh.... because if you don't the glitter will wipe off and dry all over your skin and then you would look like a sparkly twilight vampire and you don't want that do you? (It's OK if you do I won't judge)
I got a ton of compliments on my spider ring from my roommates and other a couple other girls around campus today which tickled me pink! I hope you enjoy and had a safe All Hallows Eve.

Monday, October 17, 2011

No hair tie? No bobby pins? No problem! (a hair how-to)

I hate wearing a hair tie on my wrist and I haven't found the equivalent or  even a convenient way to carry bobby pins around. Sooo over the years I have come up with a way to throw my hair up without hair spray, mirrors, bobby pins or hair ties. This is an amazing hair trick to keep in your back pocket for those hot-sticky-unbearable summer events when you have no hair tools to help pull the hair off your neck and out of your face. ( Oh, the pains of long hair)
1. Finger comb your hair to eliminate the majority of snarls. 2. Pull your hair up into a ponytail and hold in one hand 3. Wrap ponytail around the hand you used to hold pony in step 2 4. Roll hair towards you (as if you where rolling up a curler) to create a messy bun 5. While holding the bun find a small section of hair towards the nape of your neck and twist hair once  around to create a tight loop 6. take the section of hair from step 5 and use it like a hair tie and pull the remainder of your bun through the loop. Continue to repeat step 6 until all of your hair feels secure.
This works best on hair that has a decent amount of texture or 'second day' hair.

Monday, October 3, 2011

Anthro Merit Badge Wooden Necklace // DIY

I mentioned in this post awhile back that I was crushing on Anthropologie wooden Merit Badge Necklace but I felt like I could make it for 2 dollars...Well, turns out I could make it for FREE. I love free. Before I begin this tutorial I must admit that I photographed this DIY 3333three3 (!) months ago and have been too darn lazy to edit the photos. Ack! Here goes nothing. Enjoy!
For this project I used a chalk pencil,  tongue depressors, paint, cheap jewelry chain, Xacto knife, a jewelry file and a thin piece of wood. The wood I used for this project actually fell from the bottom of a vintage buffet table that I use as my desk. I couldn't figure out where it fell from so I scratched my head then made a necklace. Alls well that ends well. If you don't have scrap pieces of wood falling from furniture in your home I would suggest using wooden tongue depressors.
Using a chalk pencil I traced out some shapes based off of the original necklace as I wanted to recreate the look. I found the circle and rectangle most visually appealing but think adding a triangle or an octagon would add a lot of visual appeal. 
Using an Xacto knife cut around your drawn out shapes slowly. Don't forget to use a self healing mat for this step. Also I can't stress the importance of doing this step slowly for a lot of reasons but mainly for safety (I want you to finish this DIY with all your fingers and skin intact) and because if you rush chances are the end result will show it. Just sayin...
To avoid getting slivers its really important you use a jewelry file or even sand paper to smooth and bevel the edges. I would recommend that you do not skip this step because if you do the necklace will create little pulls and runs on your clothing.
To make a hole with out using a drill, because I am afraid of drills, I first twisted an Xacto knife against the wood then twisted a round jewelry file around until the hole went uniformly through the wood. I am sure there is an easier way but I am also sure that way involves a drill.
Take a moment to clean up each piece with a damp cloth to remove the chalk and saw dust before you paint and finish up this DIY.
 Self explainitary really...go nuts with this step. 
I used a low grade sand paper to create a rustic and worn in look. Do you know that look? Yeah, I love it.
Again, self explainitory. Go nuts.

Friday, September 23, 2011

Thats a wrap!

Hey y'all! I am here today to bring to your attention a DIY wrapping project for everyones inspirational pleasures. I, like many of you, am a college student which means I am never prepared when special occasions come up which is a direct result of living in a tiny dorm and having ZERO storage space. Sooo....Thursday when I met up with my mommy to celebrate her belated birthday I had no idea how I was going to wrap her gift. ACK! After a couple stressed filled moments, I realized that I am an art major and a blogger... I live for crafty challenges like this! So I gathered up the latest edition of the student newspaper, painters tape, scissors, an Exacto knife and a sharpie and unleashed my imagination.
I searched for the most colorful page of the newspaper and  as luck of the draw I found a page that perfectly matched my green tape! I threw this design together in about 10 minutes by cutting out a whole bunch of shapes from the tape with the Xacto knift. I just chose shapes that I thought I would visually enjoy and rearranged every piece about 10 times which is totally OK because the painting tape won't rip the newspaper at all, or at least it didn't ripe in my experience! Warning: the tape will life a small amount of newsprint ink with every move so be aware.
This project really gotten the gears in my brain turning for the upcoming 55 days of Christmas projects...hmmmm! Let me know in the comment section how you might improve upon this idea! Xoxo Ali
Related Posts Plugin for WordPress, Blogger...